Overview
The information in this article is to assist you in building CIF records for personal clients for any demand deposit or loan account.Obtain proper consumer information to verify the identity of all individual owners, joint owners and any convenience signers prior to opening or revising an account. Click here for client identification details.
Note: Use only UPPER CASE letters and no punctuation when creating CIF records.
Determine if the client/account requires a ChexSystems inquiry.
Complete a Due Diligence questionnaire using Verafin. For more information on Verafin click here.
See US Citizen or Non-US Citizen tab for detailed instructions on building a personal CIF. See Xperience screen shots here.
US Citizen
- In Xperience > SilverLake > StreamLine Platform Menu > Create New Accounts.
- On the Inquiry/Website Selection page, click the appropriate box for the ChexSystems inquiry.
- Click OK.
- On the StreamLine New Account Entry page, do the following.
- In the Branch field, enter Branch number.
- In the Application field, click the ellipsis
 to choose the application type and click Select:
- DDA = Checking
- T = Time Deposit (CD's, IRA)

- In the Platform Type field, click the ellipsis for product options.
- Choose your product type and click Select.
- In the Account Number field, click the ellipsis
 to populate the account number and click OK.
 - To determine if the client has an existing CIF, enter the SSN, or TIN and click OK.
- If the client has an existing CIF, review all information and click Select.
- If the client does not have an existing CIF, Clear out the information in the Short Name field and click OK.

- On the New Customer page, using ALL CAPS, enter the client's First, Middle (optional), and Last name.
- Click OK.
- Enter the address, city, state and zip. Note: This can be a PO box, however you must enter a physical address on the IRS Address page.
Tax ID
Enter the Tax ID number. Note: For US citizens, this must be a valid SSN.
If you receive an error message indicating that a duplicate TIN has been entered, DO NOT override.
Tax ID Type
- Type I - Individual in the Tax ID Type field.
- Note: Enter I - Individual for US Citizens ONLY. Refer to Non-US Citizen > Tax ID Types for applicable coding for Non-US Citizen.
- Type I - Individual in the Tax ID Type field.
Tax ID Certification
- Type C - Customer has certified the TIN provided in the Tax ID Certification field.

- Type C - Customer has certified the TIN provided in the Tax ID Certification field.
Tax ID Certification Date
From the TAX ID Certification Date drop-down menu, choose Today as the certification date.

Sex
Use the drop-down menu to choose the sex.

Note: This must match the sex recorded on identification.
Class
- Click Next Records.
- Choose P PERSONAL.

- Click Select.
Birth Date
Enter the birth date in this format: mm/dd/yyyy.
Employer Name
Enter the employer name, or Unemployed if the client has no employer.
Note: If the client is retired, enter what position that he/she retired from (for example: Retired Teacher).
Officer(s)
- If instructed to add an officer, click
 and choose the officer name.
 - Click Select.
- Click OK.
- If instructed to add an officer, click
Click OK.
IRS Address Information
If you entered a PO BOX for the mailing address, you must enter a physical address in the IRS address fields.
Click OK.
Customer Identification Maintenance Page
Note: Be sure to complete all steps for both a primary and a secondary form of identification. All primary identification must be valid (not expired) and contain a photograph.- Obtain one primary and one secondary or two primary forms of identification.
- Click Add.
Identification Code
- Choose the appropriate code for Primary and Secondary identification type.
- Choose OD OTHER ACCEPTABLE SECONDARY ID for the following:
- Bank statement
- Birth certificate
- Concealed weapons permit
- Deed
- Diploma or GED
- Foreign Military ID
- Lease agreement
- Marriage license/certification
- Matricula consular ID
- Medical insurance card
- Property tax bill
- Utility bill
- Vehicle registration or title
- W-2 form
- Choose OD OTHER ACCEPTABLE SECONDARY ID for the following:
- Click Select.
- Choose the appropriate code for Primary and Secondary identification type.
Identification Number
Enter the number exactly as printed on the identification type provided. If the identification type does not contain a number, enter N/A.
If the Identification Code is OD OTHER ACCEPTABLE SECONDARY ID, enter the type of OTHER ACCEPTABE SECONDARY ID in the Identification Number field.
Issued By
Leave this field blank.
Place of Issuance
Enter one of the following:
- State (for example: FL, GA, AL)
- School name
- Other place of issuance (for example: US Military, US Navy, Secretary of State, Canada)
Note: For identification that does not contain an expiration date, enter No expiration date.Date of Issuance
Enter the date in this format: mm/dd/yyyy.
Expiration Date
Enter the date in this format: mm/dd/yyyy.
Note: For identification that does not contain an expiration date, enter No expiration date in the Place of Issuance field.
Verified By
Enter the contact date (today's date), your initials and then click OK.
Verify 2 forms of Identification
- After entering the client's primary identification, click Add to enter the secondary form of identification.
- Make sure that both primary and secondary identifications display in the Customer Identification List.
- Complete steps 22 - 28 for secondary identification.

- Click OK.
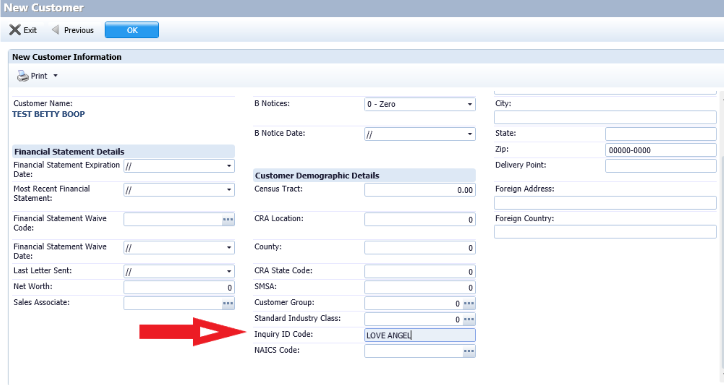
New Customer Information page
- Enter the Inquiry ID Code chosen by the client. Note: If the client does not want to establish an Inquiry ID Code, enter SEND PAC of NEED CODE in the Inquiry ID Code field.
- Click OK.
Exclusion Reason
- Choose NP.

- Click Select.
- Click OK.
- Choose NP.
Insider Code
Note: Use this code only when building a CIF for a Capital City Bank associate.
- Choose the appropriate insider code.
- Click Select.
- Click OK.
E-mail Address
Enter the client's email address.
If the client does not have, or does not want to disclose, an email do the following:- Leave the field blank.
- When you click OK you will be prompted to indicate the field is important, click the Override button.


Occupation/Nature of Business
- Enter occupation (for example: electrician, underwriter, student, unemployed, retired from _____________).
- Click OK.
Contact Information
- Click the appropriate phone type then click Select.

- Enter contact number.
- Click OK twice.
- Continue the above steps until all contact numbers have been entered, and then click OK.
- Click OK again on the next page.
- Click the appropriate phone type then click Select.
CIF Message Maintenance
Do not enter anything on this page. Click OK.
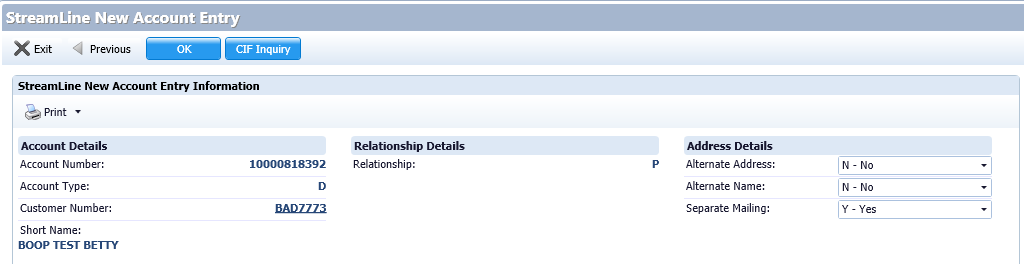
StreamLine New Account Entry
Click OK. The page now appears as follows:
Personal Account Opening
Open the account following appropriate New Personal Consumer Account procedures.
Non-U.S. Citizen
- In Xperience > SilverLake > StreamLine Platform Menu > Create New Accounts.
- On the Inquiry/Website Selection page, click the appropriate boxes for the Verafin/ChexSystems inquiry.
- Click OK.
- On the StreamLine New Account Entry page, do the following.
- In the Branch field, enter Branch number.
- In the Application field, click the ellipsis to choose the application type and click Select:
- DDA = Checking
- T = Time Deposit (CD's, IRA)

- In the Platform Type field, click the ellipsis for product options.
- Choose your product type and click Select.
- In the Account Number field, click the ellipsis to populate the account number and click OK.
- To determine if the client has an existing CIF, enter the SSN, or TIN and click OK.
- If the client has an existing CIF, review all information and click Select.
- If the client does not have an existing CIF, Clear out the information in the Short Name field and click OK.
- On the New Customer page enter the client's First, Middle (optional), and Last name using ALL CAPS. Click OK.
- Enter the address, city, state, and zip. Note: This can be a PO box, however you must enter a physical address on the IRS Address page.
Tax ID
Enter the Tax ID number.
Note: This must be 9 digits and a valid United States SSN, ITIN (begins with 9), or EIN. If you cannot obtain this information, do not open the account. Exceptions must be approved by a BSA officer.
Tax ID Type
- Choose F, G, or H.

- Click Select.
- Choose F, G, or H.
Tax ID Certification
- Choose C.
- Click Select.
- Choose C.
Tax ID Certification Date
Click the arrow to choose Today as the certification date.
Sex
Use the drop-down menu to choose the sex.
Note: This must match the sex recorded on identification.
Class
- Choose P.
- Click Select.
- Choose P.
Birth Date
Enter the date in the following format: mm/dd/yyyy.
Employer Name
Enter the employer name, or Unemployed if the client has no employer.
Note: If the client is retired, enter what position that he/she retired from (for example: Retired Teacher).
Officer(s)
- If instructed to add an officer, click and choose the officer name.
- Click Select.
- Click OK.
- If instructed to add an officer, click
IRS Address Information
- If you entered a PO BOX for the mailing address, you must enter a physical address in the IRS address fields.
- Click OK to advance to next screen.
Customer Identification Maintenance Page
Note: Be sure to complete all steps for both a primary and a secondary form of identification. All primary identification must be valid (not expired) and contain a photograph.- Obtain one primary and one secondary or two primary forms of identification.
- Click OK.
Identification Code
- Click to choose the appropriate code for Primary and Secondary identification type.
- Click Select.
Note: See identity verification here.
- Click
Identification Number
Enter the number exactly as printed on the identification type provided. If the identification type does not contain a number, enter N/A.
Issued By
Leave this field blank.
Place of Issuance
Enter one of the following:
- State (for example: FL, GA, AL)
- School name
- Other place of issuance (for example: US Military, US Navy, Secretary of State, Canada)
Note: For identification that does not contain an expiration date, enter No expiration date.Date of Issuance
Enter the date in this format: mm/dd/yyyy.
Expiration Date
Enter the date in this format: mm/dd/yyyy.
Note: For identification that does not contain an expiration date, enter No expiration date in the Place of Issuance field.
Verified By
Enter your initials and then click OK to advance to next screen.
Verify 2 forms of Identification
- After entering the client's primary identification, click Add to enter the secondary form of identification.
- Ensure both primary and secondary identifications are reflected in the Customer Identification List.
- Click OK to advance to next screen.
New Customer Information page
- Enter the Inquiry ID Code chosen by the client. Note: If the client does not want to establish an Inquiry ID Code, enter SEND PAC or NEED CODE in the Inquiry ID Code field.
- Enter the client's Foreign Address.
- Note: If an alien does NOT have a foreign address, enter n/a in both the Foreign Address and Foreign Country fields.
- Click OK.

Exclusion Reason
- Choose FP.

- Click Select.
- Choose FP.
1042S and W8 BEN Reporting


Complete the following required fields:- Reporting Chapter - Enter 3.
- Alien Country of Residency
- Alien Country of Citizenship
- Alien Chapter 3 Exemption Code - Choose 2
- Alien Chapter 4 Exemption Code - Choose 15
- Alien Chapter 3 Status Code - Choose 16
- Alien Chapter 4 Status Code - Choose 23
- Alien Postal City - If no the client has no foreign address, then enter N/A
- Alien Postal Province
- If Canada - CA, enter one of the following provinces:
- AB - Alberta
BC - British Columbia
MB - Manitoba
NB - New Brunswick
NL- Newfoundland and Labrador
NS - Nova Scotia
NT - Northwest Territories
NU - Nunavut
ON - Ontario
PE - Prince Edward Island
QC - Quebec
SK - Saskatchewan
YT - Yukon
- AB - Alberta
- If Canada - CA, enter one of the following provinces:
- Alien Postal Code (Zip)
- Alien Postal Country
- Alien W8 Certification Date
- Enter Today's Date
- Alien W8 Expiration Date
- W8 Type
- Use drop- down to choose BEN, BNE, etc.

- Use drop- down to choose BEN, BNE, etc.
- W8 Status - Choose O - On File
- Foreign Tax ID
- If client has a foreign TIN, enter the foreign TIN in this field.
- If client does not have a foreign TIN, enter this phrase: NOT LEGALLY REQUIRED.
E-mail Address
Enter the client's email address.
If the client does not have, or does not want to disclose, an email do the following:- Leave the field blank.
- Click Shift + F1to override the field.
- DO NOT enter NA, N/A or Invalid.
Occupation/Nature of Business
- Enter occupation (for example: electrician; underwriter; student; unemployed; Retired from _____________).
- Click OK to advance to next screen.
- Click OK again.
Contact Information
- Click the appropriate phone type then click Select.
- Enter the contact number.
- Click OK twice.
- Continue the above steps until all contact numbers have been entered, and then click OK.
- Click OK again on the next page.
- Click the appropriate phone type then click Select.
CIF Message Maintenance
Enter nothing on this page. Click OK.StreamLine New Account Entry
Click OK. The page now appears as follows:

Personal Account Opening
Open the account following the Opening a New Individual Account procedures.